Sunday, December 27, 2009

Inky Fingers

Over at just Buggin our newest challenge is Inky Fingers, using Ink to jazz up your Cricut Die cuts.

I used a lot of stars from George for this layout, I spread the stars all around the focal photo, across two pages. The ink adds a little extra deminsion and makes the stars pop off the page a bit.
The paper is Basic Grey and the title font is MIckey Mouse Font. Thanks for looking!


Saturday, December 12, 2009

Just Buggin' Challenge 15

This week is challenge 15 at Just BUggin! This challenge was to create something witha Holiday theme.
http://justbugginchallenges.blogspot.com

I am in the midst of doing a 12 days of Christmas celebration for Mrs. Fitzgerald, Lindsay's teacher. For the 7th day of Christmas she recieved 7 decorated gift bags. I'd share my dorky poem with you, but then you'd just laugh at me and my lack of poetry skills!


HEre are two of the bags that I made, all 7 used the Cricut and various cuts. These 2 used Very Merry Tags, A Child's Year and Winter WOodland. I added loads of glitter glue because sparkles make everything prettier!


Friday, November 27, 2009

Just Buggin' Challenge 13

Here is my first design team project. The challenge was to sew your die cuts, it could be real machine sewing, hand sewing, stamped sewing or even pin stitching.

You can see other fun projects, or submit your own at justbugginchallenges.blogspot.com .

I had these pictures of Lindsay on a field trip to a local horse farm with her preschool class. I whipped out my Animal Kingdom cartridge and cut out the horse at 5 inches. I wanted to give him a more realistic mane and tail. I used my Bazzil Stich'z flourishes templates and laid them out to give him a mane. My advice for you is to only do one line at a time, when I started I put the whole design on with a pencil and all the dots made my head go crazy so I had to erase and start over.

Here are the two pages, I stitched little yellow x's on the corners of the journaling box and on the focal pics on page 2.

Here they are together.


And a close up of the title. The title font is Mickey Mouse Font cut at 1 (H and A) and 3/4 the rest the letters.


Friday, November 20, 2009

Gypsy Giveaway

There is this up and coming blog called "The Gyspy Spot" and they are giving away a Gypsy, how cool is that!

All the details to enter are at this link, so go enter!

http://the-gypsyspot.blogspot.com

Monday, November 16, 2009

Card class cards

I mentioned in a few other posts that I was preparing for a card class for my friends. My good friend, Aura, used to teach one of these every year for us to get our holiday cards done, but she recently moved away and it was requested that I do the class.

I was a little nervous because Aura is a really, super talented Card-maker. Her designs awe me!

I got a lot of inspiration from various blogs and tweaked some designs to fit my needs. One came from Christmas with the Cricut (love that blog) and a few were inspired by posts on Split Coast stampers, and still some were my idea!

I made 5 cards, but I am going to blog about 4 because the 5th one is one of my DT projects and I will post it on the DT blog first (in a week or so :D ).

Aura is a big, big SU! user, she used to be my sales rep, so I got loads of sets from her. I made 3 of my cards using SU stuff, and 2 more that were all Cricut.

This one was from Christmas with the Cricut. I loved that they used Designer's Calendar, which was the cartridge I won for being in the Cricut Chirp spotlight. I hadn't really used the cartridge too much so was excited to be inspired by their blog. If you haven't been there it is http://christmaswiththecricut.blogspot.com/.


Here are a few using SU stamps. I pulled ideas from a variety of cards on Split Coast stampers. I love the stamp set Deer Friends. It was a Hostess set that I scored on Ebay for $22. I love it!


This one was using the Mini Mates set from SU!, the paper is from Hobby LObby. I loved this paper, it is not your typical Christmas paper but I think it is just so classy!. I stickled the ornament with black and red stickles. I used the 1 and 3/8 punch to punch through the black layer and the Happy Holidays stamp is on the inside of the card.

Like I said, there will be one more, but it is for a DT challenge so I can't share it just yet.

Sunday, November 15, 2009

Just Buggin' Challenge #11- A cute little card!

I made cute little card for the Just Buggin' Challenge Blog. I was just made a member of their Design Team and although this project isn't a DT challenge,I thought I'd jump right in with this little card.

If you are a Cricut fan you can jump right in as well. The challenge was to use an animal die cut and if you don't have one you can create your own! http://justbugginchallenges.blogspot.com

I used this cute little reindeer head from Doodlecharms. I also gave him a Santa hat from Doodlecharms. For some 3-D effects I gave him a bright shiny Stickles nose and a fluffy white pom pom on his hat. For a touch more whimsy I gave him oversized oogly googly eyes.

The circles and scallop circle are all from Accent Essentials. I added a little Basic Grey paper and some ribbon and a hand cut tiny "for you" tag and the front is all ready to go!


To give this darling little guy a big sense of purpose I added a little strip of the same Basic Grey on the inside to form a pocket to hold a gift card, or good ol' cash! To make the pocket I just glued the paper strip on 3 sides and slipped the card in. To gussy up the pocket a touch I added a scalloped strip of paper!


I think I am going to give this cutie to my sister-in-laws new boyfriend for Christmas, well not with a blank CVS card! This little guy is sure to make anyone smile!

Wednesday, November 11, 2009

Just Buggin' Design Team

There is this fun little challenge blog, http://justbugginchallenges.blogspot.com/, every week there is a challenge that involves using a certain Cricut cart, or a specific crafty item, like glitter. Anyway, the owner of the blog decided to create a design team. Some members will create fun projects weekly and others (like me) will make something bi-weekly.

I have so much going on with church, girl scouts, room mom stuff and just general school volunteering that bi-weekly is all I can squeeze in.

So pop over there soon and see what all these talented ladies have created to share with you!

Tuesday, November 10, 2009

Blog header

Is under construction... okay that' s a lie it will be soon. I have to make it on the other computer, so for how you have a Thank-oween blog to view or maybe that's Hallo-giving. Either way, soon I will be ready for THanksgiving.

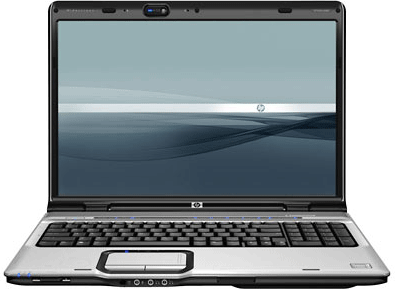
Got my new HP!


So ever since I cancelled the Gypsy, I have been on the hunt for a netbook to run DS on the go. Well, I ended up getting a full laptop from HP. I got up insanely early, early as in most college kids were probably still awake from the day before!


Anyway, I was first in line to get the laptop at Wal-mart for their "Pre-Black Friday Saturday sales" I think they are supposed to have these sales every Saturday up to Turkey Day. It wasn't all that well advertised if you ask me, but the deals were pretty good.


My HP has the new Windows 7 and is awesome! I have also installed my Design Stuido on it and have been having a blast creating things. I haven't yet cut anything, but will really soon, I seemed to be bogged down right now with all my committments... yes I am a chronic volunteer :D

So hopefully after this card class I am teaching on Sunday I will be able to work on my own creations and blog about them!
Oh and just for your information I think Windows 7 rocks! It has some great features! My personal fave that I think is a Windows 7 feature and not an HP feature is Sticky Notes. I can put little digital post-its on my desktop screen to remind myself of stuff. I love it. Right now my sticky notes remind me that the girls have a pic appt tomorrow and I just deleted one that reminded me to go to McG at 1:45 and that our first Girl Scout meeting was at 3!!!

Sunday, October 25, 2009

cancelled my gypsy!

I still would love to have one some day and I love the carts that come preloaded on it, but after reading reviews and then reading more and more reviews I came to the realization that this product has great possibilities but was released a smidge too soon. It has a lot of flaws, some in the programming and some with the actual construction (some people were missing things as basic as the USB port)


So someday when the bugs are worked out and the price drops I will get it, but until then hubby has decided it makes more sense to get a netbook and load my Cricut Design Studio on there. I like this plan because a netbook can do other things too :D

So now I am waiting on him to find the perfect one of these. Darn thing will probably be black, not an awesome pink or grrrn, but I'll deal.

Wednesday, October 14, 2009

Early Christmas AKA I'm such a sucker....

Cricut just released a new little toy called the Gypsy. I ordered it yesterday, I am trying not to think about what I spent, but what I saved (That's how my mom taught to me to look at sales :D )I used a coupon and got it for about 200 off (Or at least according to HSN's MSRP. Not that I'd ever pay that).
But it wont be here for a while, it has "extended shipping" but until then I will look forward to it!
The gypsy can hold your whole cart library, meaning I won't have to worry about lugging them to crops and you can create designs on the little screen by welding together shapes and letters.

It also comes with two carts already loaded, they are exclusive to the Gypsy and you can't get them anywhere else.


It also came with a new cart called, DESTINATIONS, I have no clue what's on it, I might love it, but if I dont I will try and get rid of it on Ebay and make a little of my money back :D


Saturday, October 10, 2009

Goodie Gobblers

My Aunt is renting a table at a craft fair the first weekend of November and she wanted me to create a few things to add to her booth.

I have a few things that I have already whipped up and wanted to share one of my creations.

You'll be shocked that not everything uses the cricut, however this project does :D
After creating these I have decided that I am going to make more for Lindsay's class. It'll be a nice little treat to take home after our Thanksgiving Feast, plus they are soooooo freakin' cute!
Here are my Goodie Gobblers!
If you're interested in how I made these tough! I'm not sharing....
totally kidding!
I cut out each turkey from the My Community Cart at 5 inches, then I cut out the blackout version as well. Next his tail feathers in brown. I inked each piece and traced around the shape fo his head. I colored his wattle, beak and feet and then stickled his wattle and beak for a little extra pizazz.

After everything was dry I punched 2 holes in each tail feather and laced a mini-tootsie pop through. You need the black out version to help keep the turkey stable and to keep his paper from buckling.
I think these would make adorable placecards as well, if you attached a small strip of paper with the person's name! Sooo cute!


Monday, October 5, 2009

Lindsay's fall T-shrit (made with cricut)


So after I made Lydia's witch's feet shirt Lindsay really wanted her own shrit. After I started making this one she told me she wanted a Halloween one not a fall one, well at this point she will get what she gets and not throw a fit. The Halloween one will be coming along sometime soon.

My friend Sara, http://www.whimsies-whatnots.blogspot.com/, did this bulletin board for her son's teacher's classroom. Isn't it adorable.


She was inspired by this ad for Shaw Flooring, http://www.shawfloors.com/, so then I was inspired by her inspiration to create this shirt for Lindsay.

This is a one of a kind creation because sewing on all those leaves was very time consuming, plus I had to change the thread 5 times.

I think the shirt was worth it and hopefully Lindsay likes it!

I used George Oval 2 at size 1 1/4 to 2 inches and the tree is from Paper Doll at 10.5 inches Real Dial Size and the owl is 1 1/4 inches on shadow from one of the princess carts.


Excited!

First I have another project to post later, my friend Sara is going to laugh at it :D (in a good way).

But I wanted to tell you that the Teacher's Lounge gift I posted here won the contest I entered it in and I got a free digital kit and another cartridge. I am unsure if I get to pick the cart, I hope I do, I dont want a duplicate.

But I had to share the news as I was super excited!!

Saturday, October 3, 2009

A treat for the teachers... Cricut of Course :D


I wanted to make a little treat for the teachers at Lindsay's school, so of course I turned to my cricut and my favorite cartridge Paper Doll Dress Up. I hardly ever use that cart for the dolls, alhtough they are cute! It has so much stuff on it and I dont think I can sing it's praises enough!

I also used Tags, Bags, Boxes and More, I have had it awhile and it is a great cart for little bags and boxes but I dont use it much so I was happy to dust it off.

I cut everything in the bag on Real Dial Size, which like the witch's shoes for the shirt, is super important becuase if you dont use RDS you item will be something itty bitty!!

It is important to note that the owl, love that owl, is from Storybook, as is the font on the front! I honestly bought that darn cart for the owl, don't tell my husband that.

I used a lot of stickles and ink to give everything more depth.

After I cut out everything and gussied it up I attached them to wood skewers that I had painted black, then I poked them in a floral brick in the bag. Tucked in some tissue paper and loads of candy for the teachers.

I am going to pop it in the teacher's lounge and they can take a piece of candy if they dare!

Here are some close up pics!


I think this Jack-o-lantern is freakin' adorable!

I layered 2 witch's pots, one cut in purple and one in black. I stickled the purple for frothing bubble effect and added the cut little frog!


That mummy, he is hidden paper doll and he really should be front and center! You can also see my owl, oh how I love him!


Just another all over glance!


This skeleton is hidden in PDDU as well and I think he rocks, I tucked him in a Dracula coffin!

I hope the teacher's like it!!
I couldn't have done this without my trusty cricut, which Lindsay now wants to use, can't say that I am onboard for that :D
Be sure to check out the latest Cricut Promotion, The Great Gypsy Escape! Purchase one of 4 new Cricut catridges for a chance to win a new Gyspy (handheld design studio for Cricut), $2,000 travel vouchers and even a $30,000 trip to one of 5 fabulous locations!

Wednesday, September 30, 2009

A little sad....

When I first moved here I didn't have any friends, I lived here well over a year before I finally found some friends. Having a new baby helped, it was a instant bonding type thing.

Anyway, I met this group of about 8 women and their babies and we became great friends, we have really bonded during this time and had all our second babies (and in some cases third) together.

Slowly but surely the group is moving on with other things in their lives, we have one that moved back to England, another that moved 2 hours away, one is now in Mexico and today I find out one is moving to another state (about 8 hours away).

So while I understand that life changes and we all move on, I will still take this moment to be sad and miss my friends.

I love my Cricut


I you haven't figured this out yet, then you really don't know me :D

If you browse the internet there are all sorts of contests out there right now because Cricut just introduced the Gypsy. It's a handheld device that stores your cartridges, instead of having to pop your carts in and out. I haven't gotten one, maybe someday, I am waiting for the price to drop and for the bugs to get worked out.


Anyway, right now on a message board I go to they are having a Cricut contest and I have submitted a few things I have made. I recently submitted the shirt I made Lyd and I am also submitting items I created for Lindsay's party.


Anyway, in case you can't remember what I made here is a link to pics of those things.
Be sure to check out the latest Cricut Promotion, The Great Gypsy Escape! Purchase one of 4 new Cricut catridges for a chance to win a new Gyspy (handheld design studio for Cricut), $2,000 travel vouchers and even a $30,000 trip to one of 5 fabulous locations!
I also couldn't have made Lindsay's invitations without the cricut either.

Friday, September 25, 2009

Cuteness with the Cricut!

So you can cut fabric with the Cricut. I knew this but had never undertaken a project that involved fabric until today!

As I stated earlier I have an extreme addiction to Halloween Shirts for my girls. A friend found a cut shirt with witches shoes on it, she recreated it with some pattern, but I decided to attempt it with my Cricut.

I pulled out my Cricut cart stash and found the Witch cut on Paper Doll Dress Up. This cart has sooooo much stuff, stuff you cant even see on the back of the box.

I was super excited to get started so I headed to WM and got a couple of fat quarters for $1, I bought the green and orange fabric in fat quarters and then just picked up some Wonder Under and plain black fabric.

To cut fabric with your cricut you first need to iron the Wonder Under onto your fabric. I whipped out a brand new Cricut mat because I wanted to be sure my fabric stuck really well. You stick down the fabric and pick out your cut. Before I started I cut paper to make sure my sizes were correct, I'd hate to waste the fabric.


I cut the witch's shoes at 3 inches, real dial size. That part is important if you cut at 3 inches without real dial size they'd be itty bitty! The spider is also from PDDU and is on the monster cut section. After cutting I peeled away the excess fabric and was left with shoes and a spider.


Next I cut the squares for the Witch's tights using George and a 1.5 inch square. They were also ironed on to wonder under.
After all your bits are cut out, iron them onto your shirt.
I free cut the bottom of the witch's dress, I didn't like the way it looked with the legs just ending in the middle of the shirt.


After ironing I had to zig zag all around the bits and I gave the spider button eye balls.


My model :D


Final shirt.. I added a yellow cross stitched mouth to my little spider friend.


I am considering cutting EEEK out on the Cricut and putting it on the bottom of the back of the shirt, but I wanted to share the cuteness so I haven't done that yet.


The cricut made this project a snap and you can find more info on the little machine that I love at www.cricut.com and you can find stuff about their contests here...

Be sure to check out the latest Cricut Promotion, The Great Gypsy Escape! Purchase one of 4 new Cricut catridges for a chance to win a new Gyspy (handheld design studio for Cricut), $2,000 travel vouchers and even a $30,000 trip to one of 5 fabulous locations!

Thursday, September 24, 2009

Let's pretend it's October!

I have gussied my blog up for Halloween. It is one of my top two holidays. I just love it and I am raising the girls to love it as well!

I am in the process of creating (hopefully, if my sewing machine will cooperate) a cute little something for Lydia, that I will share whenever I finish it.

I should tell you about my addiction... Hi my name is Michelle and I am addicted to Halloween Shirts for my kids. They each have something like 15+. I ran into a deal last year after Halloween when WM had all their shirts for $1 and I loaded up. I am going to try to send Linds to school everyday in October with a Halloween shirt (except for color days, well unless they are orange and black color days!).

Anyway, I want to be the first to tell you Happy Halloween!

Wednesday, September 23, 2009

Circus, Circus...

No, We didn't go to a hotel in Vegas. We went to the Carson and Barnes Circus that came to town.

It was actually a pretty nice circus. We went to another one 18 mons ago and it was odd, very odd, did I say it was odd?

Anyway, the first thing the kids did was ride on an Elephant...

4 kids was $24 to ride for 30 secs... that's $.80 a sec.

They had all the regular acts, animals, trapeze, contortionist, hula hoop girls, some motorcycle guy, clowns (AKA guys with red noses EEEEEEK) and cotton candy:D

Lydia was terrified and watched the whole show with her small hand clasped firmly on her mouth. If you popped her right hand off her face, she'd immediately pop the left one up.

Afterwards we found out she loved the "girls in orange with the pelephants" and hated those "guys with red noses". She got in bed with me last night saying that she couldn't sleep because of those red noses... poor baby.

I took loads of pics of everything. I did hate the lighting that they have in those giant tents!

Here are the girls in orange with the elephants.

This guy was part circus part side show. Freakin' weird. He must have been born without some normal body part, like ligaments or extra joints or some such oddness, I googled but didnt find him.


The girls liked the Hula Hoop girls too. Those suckers must have been heavy!


I always think the ribbon dancer girls are just so pretty and graceful!


EEEEK cover my eyes, it's a man with a red nose.


They paraded the animals all around and we were in "box seats" (ha ha ha) and they came really close.


There was this motorcycle dude who rode on a wire, well half way through it broke. The girl under him looked freaked out and they finally pulled it back and out of the way.

This odd human hamster wheel contraption was really close to us and the people walked on the outside blindfolded and even jumped rope.


They had these cute little puppies doing tricks too!


Just a little clown and circus girl dance action!

Cutest little circus goer ever! It was soooo humid and her hair looked soooooo fantastic it, me I looked like a hot poodle.
And here they are on their 30 sec elephant ride :D